Chewy Monster Cookie Bars: The Ultimate Crowd-Pleaser and Why They Trump Drop Cookies
Imagine a treat that combines the nostalgic joy of peanut butter, oats, chocolate, and vibrant M&Ms, but without the endless scooping and baking of individual cookies. Enter the magnificent chewy monster cookie bars! These delightful creations are not just a convenient twist on a classic; they're often superior in texture, easier to prepare, and a genuine godsend when you need to feed a hungry crowd. Forget the fuss of traditional monster cookies – the bar format delivers all the flavor with a fraction of the effort, making this
monster cookie bars recipe an absolute must-have in your baking arsenal.
Why Choose Monster Cookie Bars Over Traditional Drop Cookies?
The allure of monster cookies is undeniable: that perfect blend of sweet and salty, chewy and crunchy. But when it comes to efficiency and serving a large group, the bar version is the undisputed champion. Here’s why:
*
Effortless Preparation: No need to chill dough or meticulously scoop dozens of individual cookies. Simply press the entire batch into a pan, bake, and slice. This streamlined process saves significant time and effort, especially for events or last-minute gatherings.
*
Uniform Baking: Bars tend to bake more evenly than individual cookies, which can sometimes have varying sizes and doneness. With bars, you get a consistently soft, chewy interior and often a delightful crispness on the top and edges.
*
Perfect for Portions: Once cooled, you can easily cut monster cookie bars into any size you desire, from small bites for a tasting platter to generous squares for a hearty dessert. This makes portion control and serving incredibly simple.
*
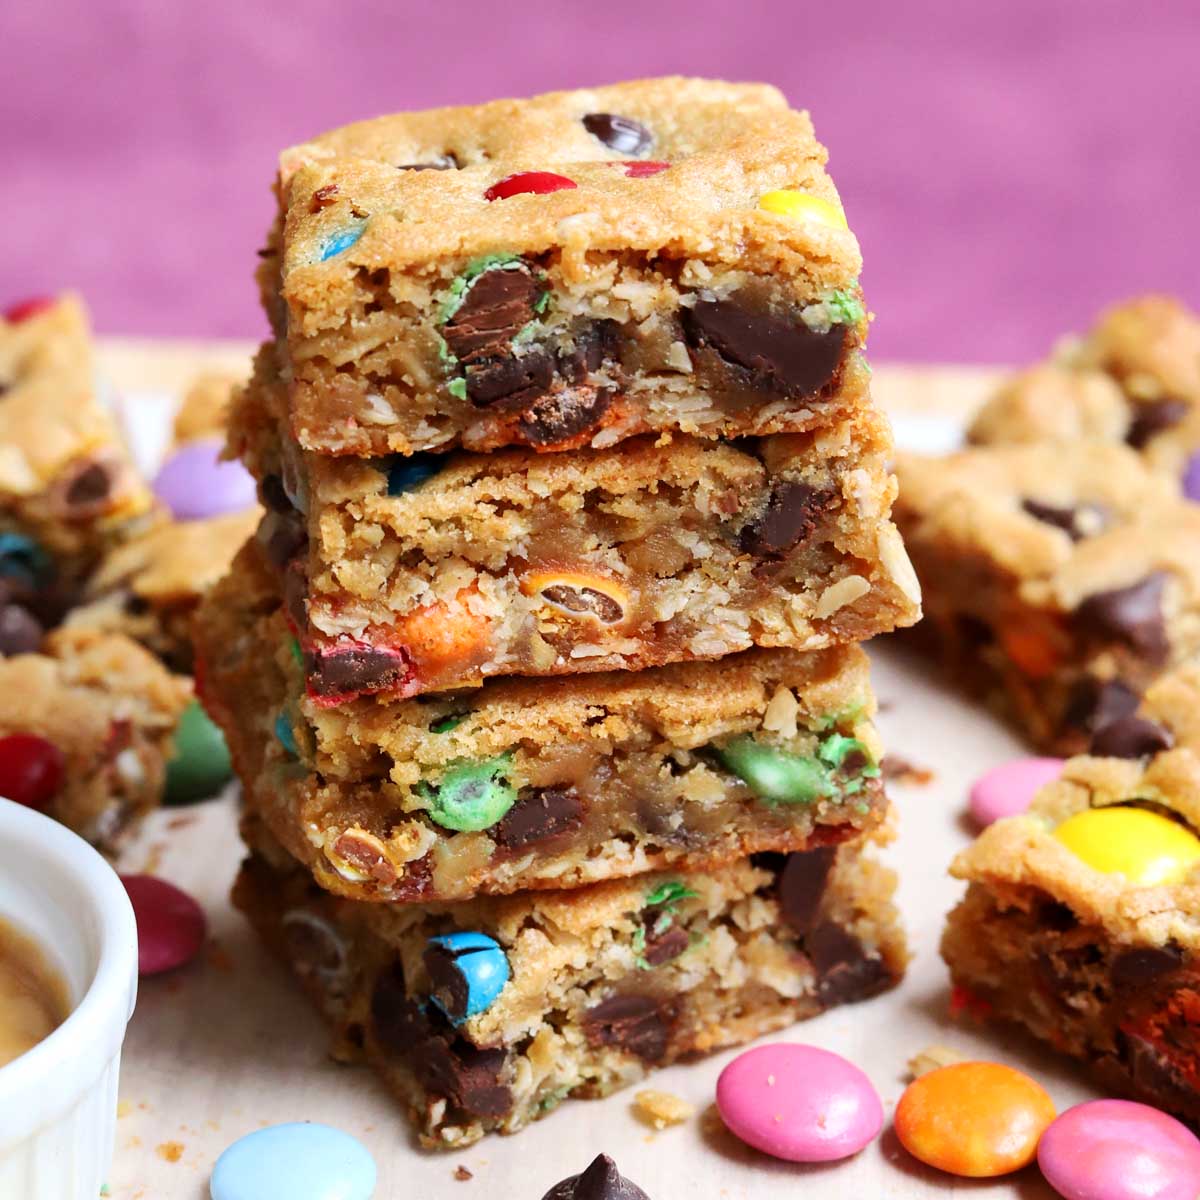
Superior Texture: Many bakers find that monster cookie bars achieve a uniquely gooey and chewy texture that's harder to consistently replicate with drop cookies. The concentrated mass of dough in a pan helps retain moisture, leading to that coveted soft-baked perfection. As the reference context beautifully puts it, they can be "slightly more gooey than the cookies and still crisp on top and bottom."
*
Travel-Friendly: Bars are inherently easier to transport than loose cookies. Stack them in an airtight container, and they’re ready for picnics, potlucks, camping trips, or school events without the risk of crumbling or breaking. This convenience was a game-changer for one family's annual camping tradition, proving how monster cookie bars can even trump beloved original recipes when time is tight.
In essence, the
monster cookie bars recipe offers all the beloved elements of the classic—rich peanut butter, wholesome oats, melty chocolate chips, and colorful M&Ms—packaged in a fuss-free, crowd-pleasing format.
The Ultimate Chewy Monster Cookie Bars Recipe
Get ready to create a batch of spectacularly chewy and satisfying monster cookie bars. This recipe is designed for maximum flavor and ease, ensuring a delicious result every time.
Yields: 16-24 bars (depending on cutting size)
Prep time: 15 minutes
Bake time: 30-35 minutes
Cooling time: 1-2 hours
Ingredients:
* 1/2 cup (1 stick) unsalted butter, melted
* 1 cup firmly packed light brown sugar
* 1/2 cup creamy peanut butter (avoid natural, oily varieties for best texture)
* 1 tablespoon dark corn syrup (optional, but highly recommended for chewiness and moisture)
* 2 teaspoons pure vanilla extract
* 3/4 teaspoon fine sea salt
* 1/4 teaspoon almond extract (adds a wonderful depth of flavor)
* 1/8 teaspoon ground cinnamon
* 1/8 teaspoon ground nutmeg
* 1 large egg
* 1 large egg yolk (the extra yolk contributes significantly to chewiness)
* 1 cup all-purpose flour
* 1/2 teaspoon baking soda
* 1 1/2 cups old-fashioned rolled oats (not instant oats)
* 1/2 cup semi-sweet chocolate chips
* 1/2 cup candy-coated chocolate pieces, such as M&Ms® (plus extra for topping, if desired)
Step-by-Step Instructions:
1.
Prepare Your Pan: Preheat your oven to 350°F (180°C). Line an 8x8-inch square baking pan with parchment paper, leaving an overhang on all sides. This "sling" will make lifting the cooled bars out of the pan incredibly easy. If you prefer thicker bars, an 8x8 is perfect. For slightly thinner bars that bake quicker, a 9x9 pan can also work, though baking time may reduce slightly.
2.
Combine Wet Ingredients: In a large mixing bowl, whisk together the melted butter, brown sugar, creamy peanut butter, dark corn syrup (if using), vanilla extract, salt, almond extract, cinnamon, and nutmeg until the mixture is smooth and well combined.
3.
Add Eggs: Incorporate the large egg and the extra egg yolk into the wet mixture, whisking thoroughly until they are completely blended. The mixture should be uniform and slightly lighter in color.
4.
Introduce Dry Ingredients (Part 1): Add the all-purpose flour and baking soda to the bowl. Whisk until just combined, being careful not to overmix. Overmixing can lead to tougher bars.
5.
Fold in the Goodies: Using a spatula or wooden spoon, gently fold in the rolled oats, chocolate chips, and M&Ms until they are evenly distributed throughout the thick dough.
6.
Press into Pan: Pour the dough into your prepared 8x8-inch pan. Using the back of a spoon or your hands (lightly greased if needed), spread the dough into an even layer, pressing it firmly into the corners. If desired, press a few extra M&Ms or chocolate chips onto the surface of the dough for an appealing visual finish.
7.
Bake to Perfection: Bake in the preheated oven for 30 to 35 minutes, or until the edges are golden brown and the center of the bars looks set but still slightly soft. Remember, they will continue to set as they cool. Avoid overbaking if you want that coveted chewy texture!
8.
Cool Completely: This step is critical! Allow the monster cookie bars to cool *completely* in the pan on a wire rack before attempting to remove or cut them. This can take 1-2 hours, but patience will be rewarded with perfectly structured bars. Once cool, use the parchment paper overhangs to lift the entire slab out of the pan, then transfer to a cutting board and slice into your desired bar size.
For another fantastic and speedy bar recipe, be sure to check out our
Easy Monster Cookie Bars: Quick Recipe with M&Ms & Peanut Butter.
Tips for Perfect Monster Cookie Bars Every Time
Achieving chewy, flavorful monster cookie bars isn't difficult, but a few pointers can elevate your baking game:
*
Don't Skimp on Cooling Time: We cannot stress this enough. Warm bars will crumble and be difficult to cut. Cooling allows the fats to solidify and the flavors to meld, resulting in neat, perfect squares.
*
Pan Size Matters: This recipe is optimized for an 8x8-inch pan, yielding thicker, chewier bars. If you use a 9x13-inch pan, the bars will be thinner, and the baking time will likely be reduced to 20-25 minutes. Keep a close eye on them to prevent overbaking.
*
The Power of Parchment Paper: Lining your pan is non-negotiable. It makes removal and cleanup incredibly easy, ensuring your beautifully baked bars stay intact.
*
Ingredient Temperature: While the butter is melted, ensure your egg and egg yolk aren't fridge-cold. Room temperature eggs emulsify better with the melted butter and sugar, leading to a smoother batter.
*
Choose Your Peanut Butter Wisely: Stick with creamy, shelf-stable peanut butter (like Jif or Skippy) for consistent results. Natural peanut butter, which often separates, can alter the texture of the bars.
*
Don't Overmix the Flour: Once you add the flour, mix only until just combined. Overmixing develops the gluten in the flour, which can lead to tough, dry bars instead of chewy ones.
*
Customize Your Mix-Ins: While M&Ms and chocolate chips are classic, feel free to get creative! Add chopped nuts (peanuts, pecans), white chocolate chips, butterscotch chips, sprinkles, or even crushed pretzels for an extra salty crunch.
*
Testing for Doneness: The bars are done when the edges are lightly golden brown and the center looks set, but not completely firm. A slight jiggle in the center is okay, as they will firm up considerably as they cool.
For those looking for a truly epic baking experience, explore our guide to
Ultimate Monster Cookie Bars: Soft-Baked Perfection in Under an Hour.
Storing Your Delicious Monster Cookie Bars
Proper storage is key to keeping your monster cookie bars fresh and chewy.
*
At Room Temperature: Store cooled bars in an airtight container at room temperature for up to 3-4 days. Placing a piece of parchment paper between layers can prevent sticking if stacking.
*
In the Fridge: If you prefer a firmer bar, or if your kitchen is particularly warm, you can store them in an airtight container in the refrigerator for up to a week. Let them come to room temperature for optimal chewiness, or enjoy them chilled.
*
Freezing for Longer: Monster cookie bars freeze exceptionally well! Once completely cooled, slice the bars and wrap individual pieces tightly in plastic wrap, then place them in an airtight freezer-safe bag or container. They can be frozen for up to 2-3 months. Thaw at room temperature for a few hours before serving.
With their irresistible combination of flavors, delightful chewy texture, and unbeatable convenience, monster cookie bars are truly a superior choice for any occasion that calls for a crowd-pleasing dessert. This
monster cookie bars recipe is not just a treat; it's a testament to how smart baking can elevate classic comforts to new heights of ease and deliciousness. Give them a try, and prepare to be hailed as the hero of your next gathering!